Leather craft tools for beginners and small workshops
a[data-rs-seo-link]{text-decoration:underline!important;color:#1a56db!important;cursor:pointer!important;}a[data-rs-seo-link]{text-decoration:underline!important;color:#1a56db!important;cursor:pointer!important;}
What leather craft tools are really needed first?
The most useful leather craft tools are the ones that help a maker measure accurately, cut safely, prepare clean stitching holes, finish edges, and set basic hardware. A beginner or small workshop does not need a crowded bench on day one. A compact kit built around real projects is usually more productive than a large bundle with tools that duplicate the same job.
Public beginner guides from suppliers such as Weaver Leather Supply and Tandy Leather generally point to the same foundation: a cutting surface, knife, ruler or square, marking tools, stitching tools, mallet, punches, needles, thread, and basic edge-finishing tools. The practical question is not how many tools can be bought, but which tools make it possible to complete a wallet, belt, strap, pouch, or repair with repeatable results.
The core tool groups and what each one does
Leatherworking is easier to plan when tools are grouped by task rather than by catalog category. Most projects follow a clear sequence: plan, mark, cut, prepare holes, stitch or set hardware, finish edges, and maintain the piece. The tool groups below support that workflow.
Measuring and marking tools
Accurate layout prevents waste and rework. A steel ruler, square, scratch awl, wing divider, and removable marking pen are common starting points. A steel ruler is preferred around knives because it resists cuts better than plastic. A square helps keep straps, card slots, and panels aligned. Wing dividers are especially useful for setting consistent stitch lines and edge distances without relying on guesswork.
Cutting and skiving tools
A sharp utility knife, craft knife, head knife, or Japanese-style leather knife can cut leather cleanly when used on a stable cutting surface. Many beginners start with a replaceable-blade knife because it is affordable and easy to keep sharp. Skiving knives and safety skivers thin leather at folds, seams, and overlap points. Skiving is not essential for every first project, but it becomes important for wallets, lined straps, and turned edges.
Punching and stitching tools
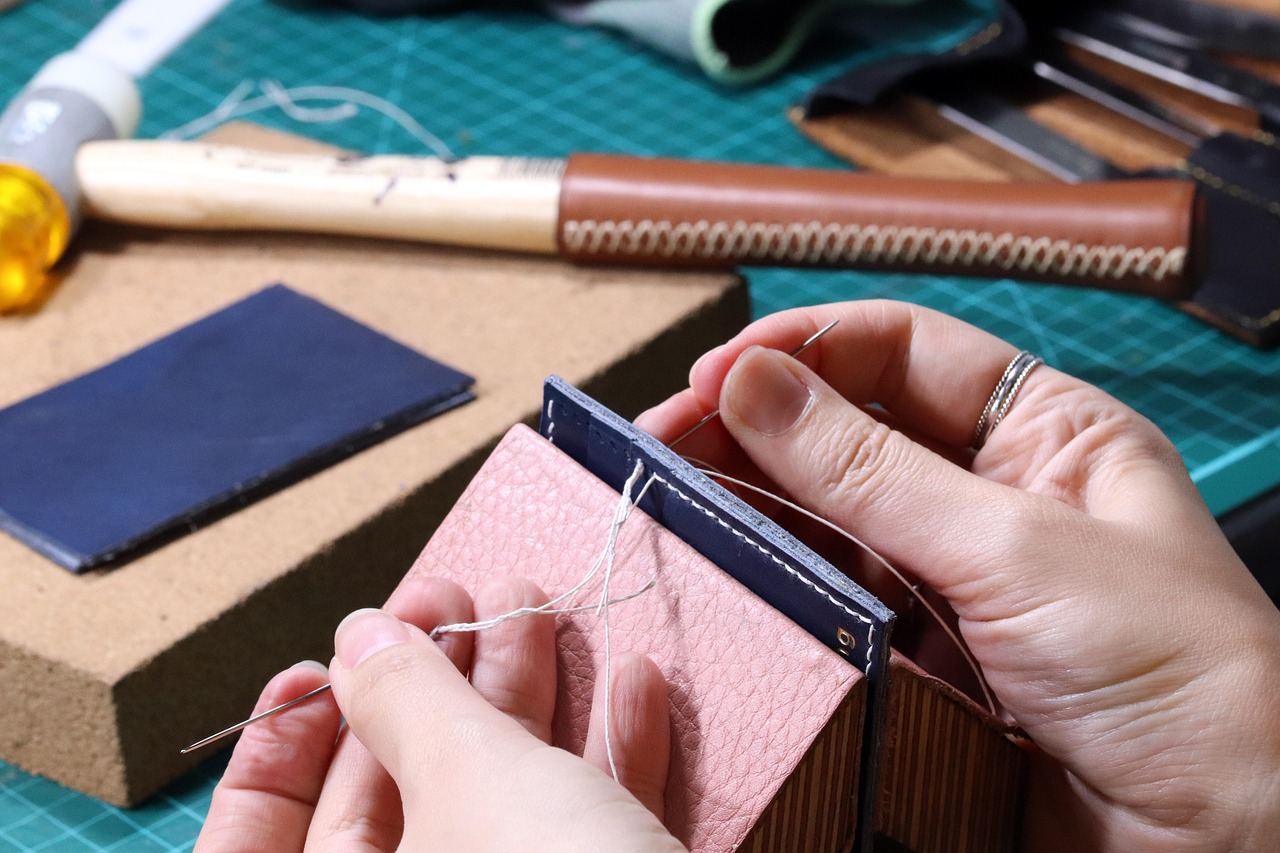
Hand-stitched leather normally needs holes before sewing. Pricking irons, diamond chisels, round punches, or an awl can create or open those holes, depending on the style of work. Harness needles and waxed thread are standard for saddle stitching, while a stitching pony holds the work steady and improves control. A mallet is used with chisels and punches. Metal hammers should generally be avoided on striking tools unless the tool maker specifically allows them, because they can mushroom or damage tool heads.
Edge-finishing tools
Edges are one of the quickest ways to judge whether a leather item has been made carefully. An edge beveler removes the sharp corner, sandpaper refines the surface, and a wood or canvas burnisher compresses the edge. Water, gum tragacanth, tokonole, wax, or other edge compounds may be used depending on leather type and desired finish. Vegetable-tanned leather usually accepts burnishing more predictably than many soft chrome-tanned leathers.
Hardware and setting tools
Belts, straps, bags, and repairs often need rivets, snaps, buckles, eyelets, or Chicago screws. Each fastener requires the correct punch size and setting tool. A common mistake is buying hardware first and only later discovering that the post length, cap size, or hole size does not match the leather thickness. Matching the tool, hardware, and leather weight before assembly helps prevent loose rivets, crushed surfaces, and unreliable fastenings.
A practical starter kit by function
The table below gives a realistic way to prioritize purchases. It is not a universal shopping list, because project type matters. A belt maker, wallet maker, and bag maker will not use exactly the same tools every day.
| Function | Starter tools | Useful upgrade | Why it matters |
|---|---|---|---|
| Measuring and layout | Steel ruler, square, scratch awl | Wing divider, pattern acrylics | Keeps cuts, stitch lines, and hardware placement consistent |
| Cutting | Utility knife, cutting mat | Leather knife, strap cutter | Clean cuts reduce sanding and make assembly easier |
| Hole making | Diamond chisels, drive punches | Higher-grade pricking irons, rotary punch | Controls stitch spacing and hardware fit |
| Sewing | Harness needles, waxed thread | Stitching pony, thread conditioner | Improves tension, alignment, and comfort |
| Edges | Sandpaper, burnisher, edge beveler | Multiple beveler sizes, edge paint tools | Creates smoother, more durable-looking edges |
| Hardware | Rivet setter, snap setter, mallet | Press-mounted dies | Reduces mis-set fasteners and surface damage |
For more general tool coverage, browse the Tools and Accessories section for related workshop topics.
How to choose quality without overbuying
Tool quality matters, but price alone does not guarantee a better result. A sensible buying approach is to spend more where precision and sharpness directly affect the finished piece, and spend cautiously on tools that may be used only occasionally. Cutting knives, chisels, pricking irons, edge bevelers, and punches deserve careful selection because they leave visible marks in the leather.
Look for clean machining and replaceable wear parts
On chisels and punches, polished teeth and clean edges help the tool enter and leave the leather with less distortion. On knives, replaceable blades can be practical for beginners, while fixed blades require sharpening skill. On setters, matching dies and stable alignment matter more than decorative finish.
Match tool size to leather thickness
Many buying mistakes come from choosing tools without considering leather weight. A small edge beveler may suit wallet leather but underperform on heavy belt leather. A short rivet may fail to grip a thick strap; an overly long rivet may bend or crush the material. Stitch spacing also affects the final look. Fine leather goods often use closer spacing, while rugged outdoor goods or heavy strap work may look better with wider spacing and heavier thread.
Buy for the next three projects, not every possible project
A project-based buying sequence keeps costs under control. If the next projects are cardholders and small wallets, prioritize precise cutting, fine stitching chisels, skiving practice, and edge finishing. For belts, prioritize a strap cutter, oblong punch, buckle-slot tools, rivet or snap setters, and a durable edge beveler. For bag making, cutting capacity, hole punching, rivets, snaps, and edge treatment become more important.
Safety, maintenance, and workshop setup
Leather craft tools are hand tools, but many are sharp or used with striking force. A safe workspace is part of the tool system. Use a stable table, a cutting mat or board, and enough lighting to see layout lines clearly. Keep the non-cutting hand out of the blade path, cut away from the body where possible, and replace dull disposable blades before they require extra pressure.
General knife-safety guidance, including guidance used in workplace settings, emphasizes that sharp, maintained cutting tools are usually more controllable than neglected dull tools. The same principle applies in a small leather shop. A dull blade can drag, skip, or require force, increasing the chance of a poor cut or injury. Store knives, awls, and punches so cutting edges do not contact other tools in a drawer.
Keep striking tools and surfaces compatible
Use a poly, rawhide, wood, or rubber mallet where appropriate. Place a proper punching board under chisels and punches so the cutting edges do not strike stone, steel, or concrete. Marble or granite slabs are useful under tooling and stamping work, but they should not be treated as cutting boards. Separating cutting, punching, and stamping surfaces extends tool life. See also: Buying Guides.
Build a simple maintenance routine
Wipe tools after use, especially after contact with dyes, adhesives, water, or edge compounds. Light oil can help protect carbon steel tools, but avoid transferring oil to unfinished leather. Strops and polishing compounds help maintain knife edges between sharpening sessions. Punches may need cleaning when leather plugs build up inside the tube.
Beginner kit or individual tools
Beginner kits can be useful when they include tools that match a clear project path. They are convenient, usually cheaper than buying each item separately, and reduce decision fatigue. However, some kits include duplicate tools, weak thread, poorly polished chisels, or hardware sizes that do not match the projects a maker actually wants to produce.
Buying individual tools gives more control. It also encourages the maker to understand why each tool is needed. The downside is that it takes more research, and shipping costs can rise when tools are purchased from several suppliers. A balanced method is to buy a small kit for cutting, stitching, and setting basic hardware, then upgrade the tools that limit accuracy or comfort.
Signs a kit is suitable
- It identifies the projects it is intended to support, such as wallets, belts, or small accessories.
- It includes a cutting surface or clearly states what surface is needed.
- It lists stitch spacing, punch sizes, thread size, and hardware sizes.
- It avoids dozens of low-use items that make the kit look larger without improving the workflow.
- It includes basic instructions or refers to clear educational material.
A project-based buying sequence
The most efficient way to build a leatherworking bench is to let projects guide purchases. This sequence keeps the tool list practical while still leaving room to grow.
For a first cardholder
Start with a knife, steel ruler, square, scratch awl, cutting mat, stitching chisels, mallet, needles, waxed thread, glue, edge beveler, sandpaper, and burnisher. This small setup teaches layout, cutting, stitching, and edge finishing without requiring heavy hardware tools.
For a belt or strap
Add a strap cutter, hole punch set, oblong punch for buckle slots, rivet setter, buckle hardware, and a stronger edge-finishing routine. Belts show whether long cuts are straight and hardware holes are centered, so measuring tools become especially important.
For small bags and pouches
Add larger cutting capacity, more punch sizes, rivet and snap tools, pattern weights, and possibly a stitching pony. Bag work often involves thicker layers, curved seams, and hardware stress points, so tool alignment and hole quality become more important.
For decorative tooling
Add a swivel knife, stamping tools, sponge, tooling surface, and vegetable-tanned leather suitable for carving or stamping. Decorative tooling is its own skill set. It is better to practice on scrap leather before applying designs to a finished project.
Common mistakes when buying leather craft tools
- Buying too many tools before choosing a project. This leads to clutter and mismatched sizes.
- Using the wrong surface. Cutting on a hard surface can dull blades, while punching on stone can damage punches.
- Ignoring leather thickness. Stitch spacing, beveler size, rivet length, and punch diameter all depend on material thickness.
- Assuming cheap tools are always cheaper long term. Poorly finished tools may damage leather, waste time, and need quick replacement.
- Skipping maintenance. Sharp edges, clean punches, and protected steel make tools safer and more predictable.
Frequently asked questions
What are the most important leather craft tools for a beginner?
A practical first set includes a cutting mat, sharp knife, steel ruler, square, scratch awl, stitching chisels or pricking irons, mallet, needles, waxed thread, glue, edge beveler, sandpaper, and burnisher. Add punches and hardware setters when a project requires rivets, snaps, buckles, or eyelets.
Can I start leatherworking with ordinary household tools?
Some household tools can help at the beginning. A sharp utility knife, ruler, and cutting board can support simple practice. However, leather-specific tools become important for consistent stitching holes, clean edges, controlled skiving, and reliable hardware setting.
Are expensive leatherworking tools necessary?
Not at the start. It is better to buy a smaller number of reliable tools and learn proper technique. Spend more on tools that affect visible precision, such as knives, chisels, punches, and edge bevelers. Upgrade when a tool limits accuracy, safety, or speed.
What is the difference between pricking irons and stitching chisels?
Both help create regular stitch placement, but tool geometry and use vary by style. Some tools mark holes for an awl to open later, while others punch through leather more directly. Makers should choose based on leather thickness, thread size, stitch appearance, and whether they prefer traditional awl work or faster punched holes.
How should leather craft tools be stored?
Store sharp tools so edges do not strike each other. Keep punches clean, wipe steel tools after use, and protect carbon steel from moisture. A tool roll, rack, divided drawer, or magnetic strip can work if cutting edges are covered and tools are easy to identify.